
If you know me and you have ever heard me talk about bagels, you know that I have a very strong opinion that bagels made outside of NYC Metro- literally anywhere else in the United States are not as good. People say “but…” but it’s clear and demonstrable that there is an environmental advantage to being in New York. Nature or nurture? I assume some of both, but instead of arguing, which is useless, I decided to do something about it, which entails of course, making my own bagels.
Now as anyone who either made bagels professionally or has tried at home can attest, this is not for the weak or faint of patience. It requires a good deal of concentration and stick-to-itiveness, and even when the job is done the tasks are not over. Bagels fresh out of the oven are doughy, hot and delicious but not like their crispy, toasted and topped counterparts.
This recipe is adapted from Homemade Baking, a beautiful appointed 12-year old book gifted to me by my sister-in-law Jane, who first made these with me. On my first flight solo it took the better part of a day to make a baker’s dozen. The recipe is based on trying to create Montreal-style Bagels, which I have never eaten fresh (though I have eaten the frozen kind) but except for the size, these are very much like the New York bagels I miss (in NY they would be called mini-bagels, which are prized for their slightly lower carbohydrate payload).
The recipe says it will make 32 bagels because after quartering the dough when ready, it assumes you can make 8 from each quarter. Thinking those would be too small, I made 3 out of each quarter (with enough remaining bits to make a 13th, satisfying my NY-er need for a baker’s dozen). You can obviously make them any size you want but 32 seems like a lot more work at every step- bagel shaping, water bathing, topping and baking. I might even double the recipe and make them larger, depending on the occasion.
Overall, the enterprise is very simple, but the process did take about four hours of work. Like any yeast-based product, you’re going to have to walk away for a few hours and find something else to do. The longer you’re away, the more volume (and if you don’t overdo it, the delicious tender chew) you can expect.

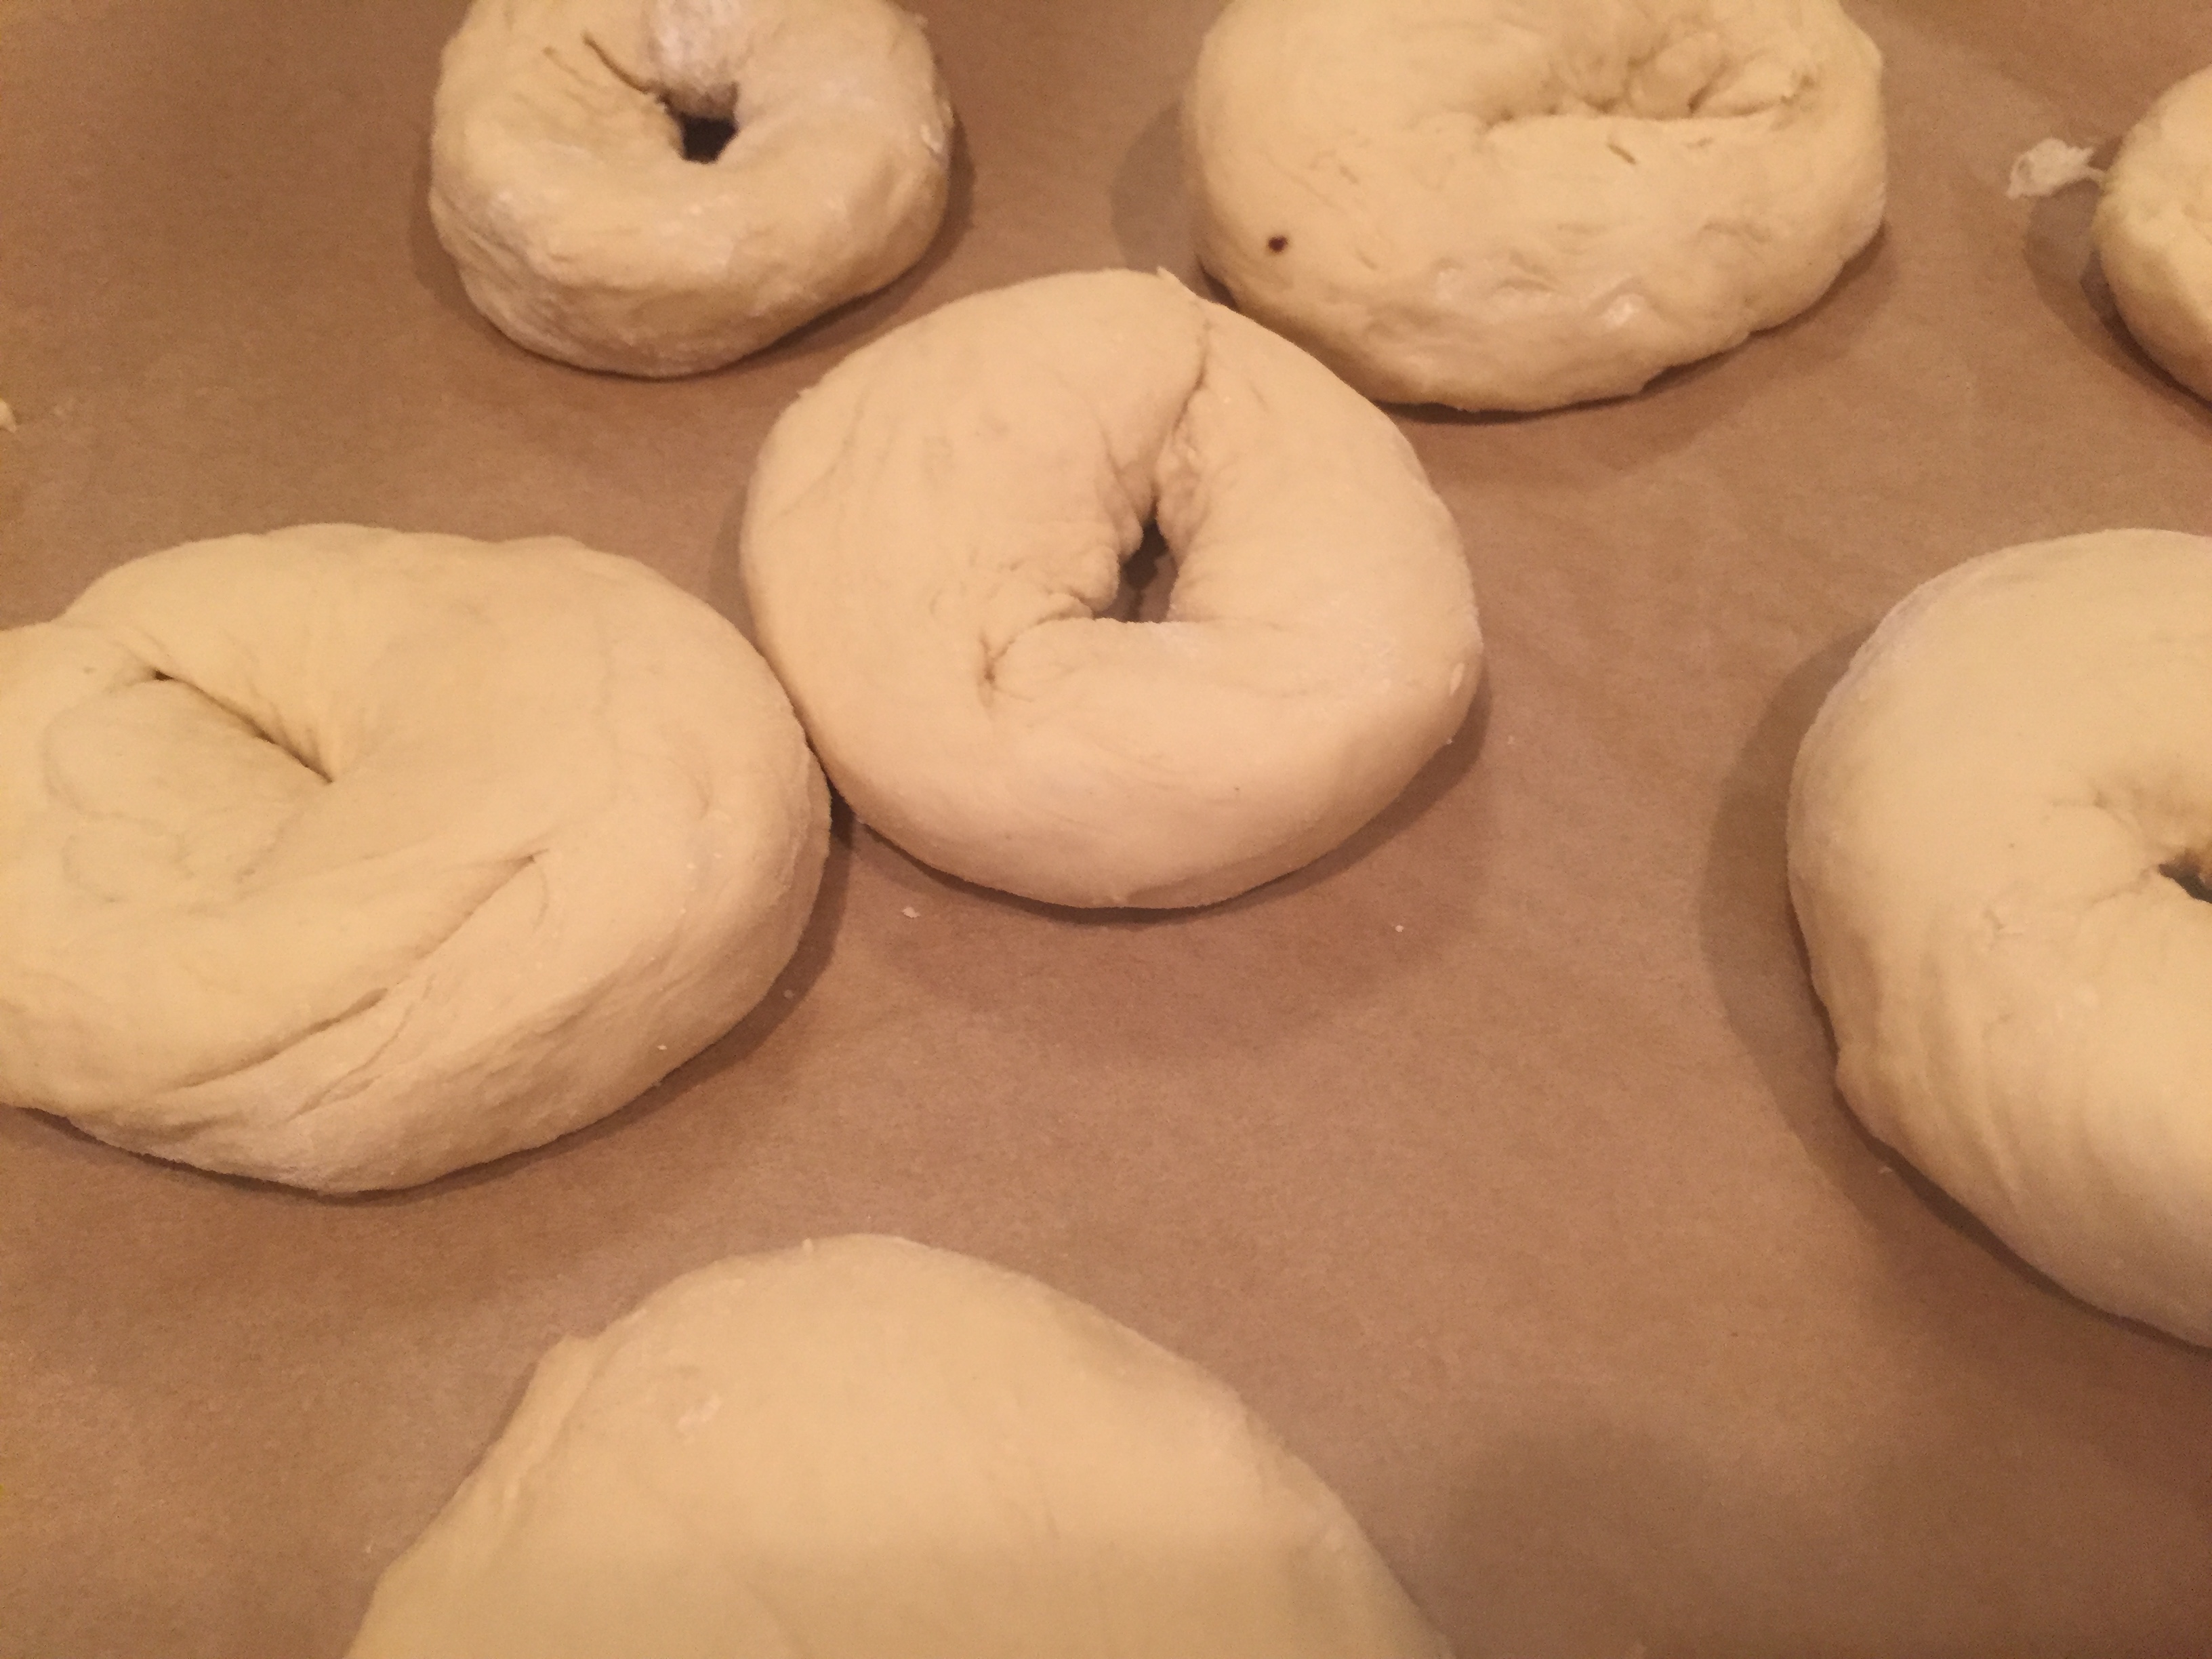
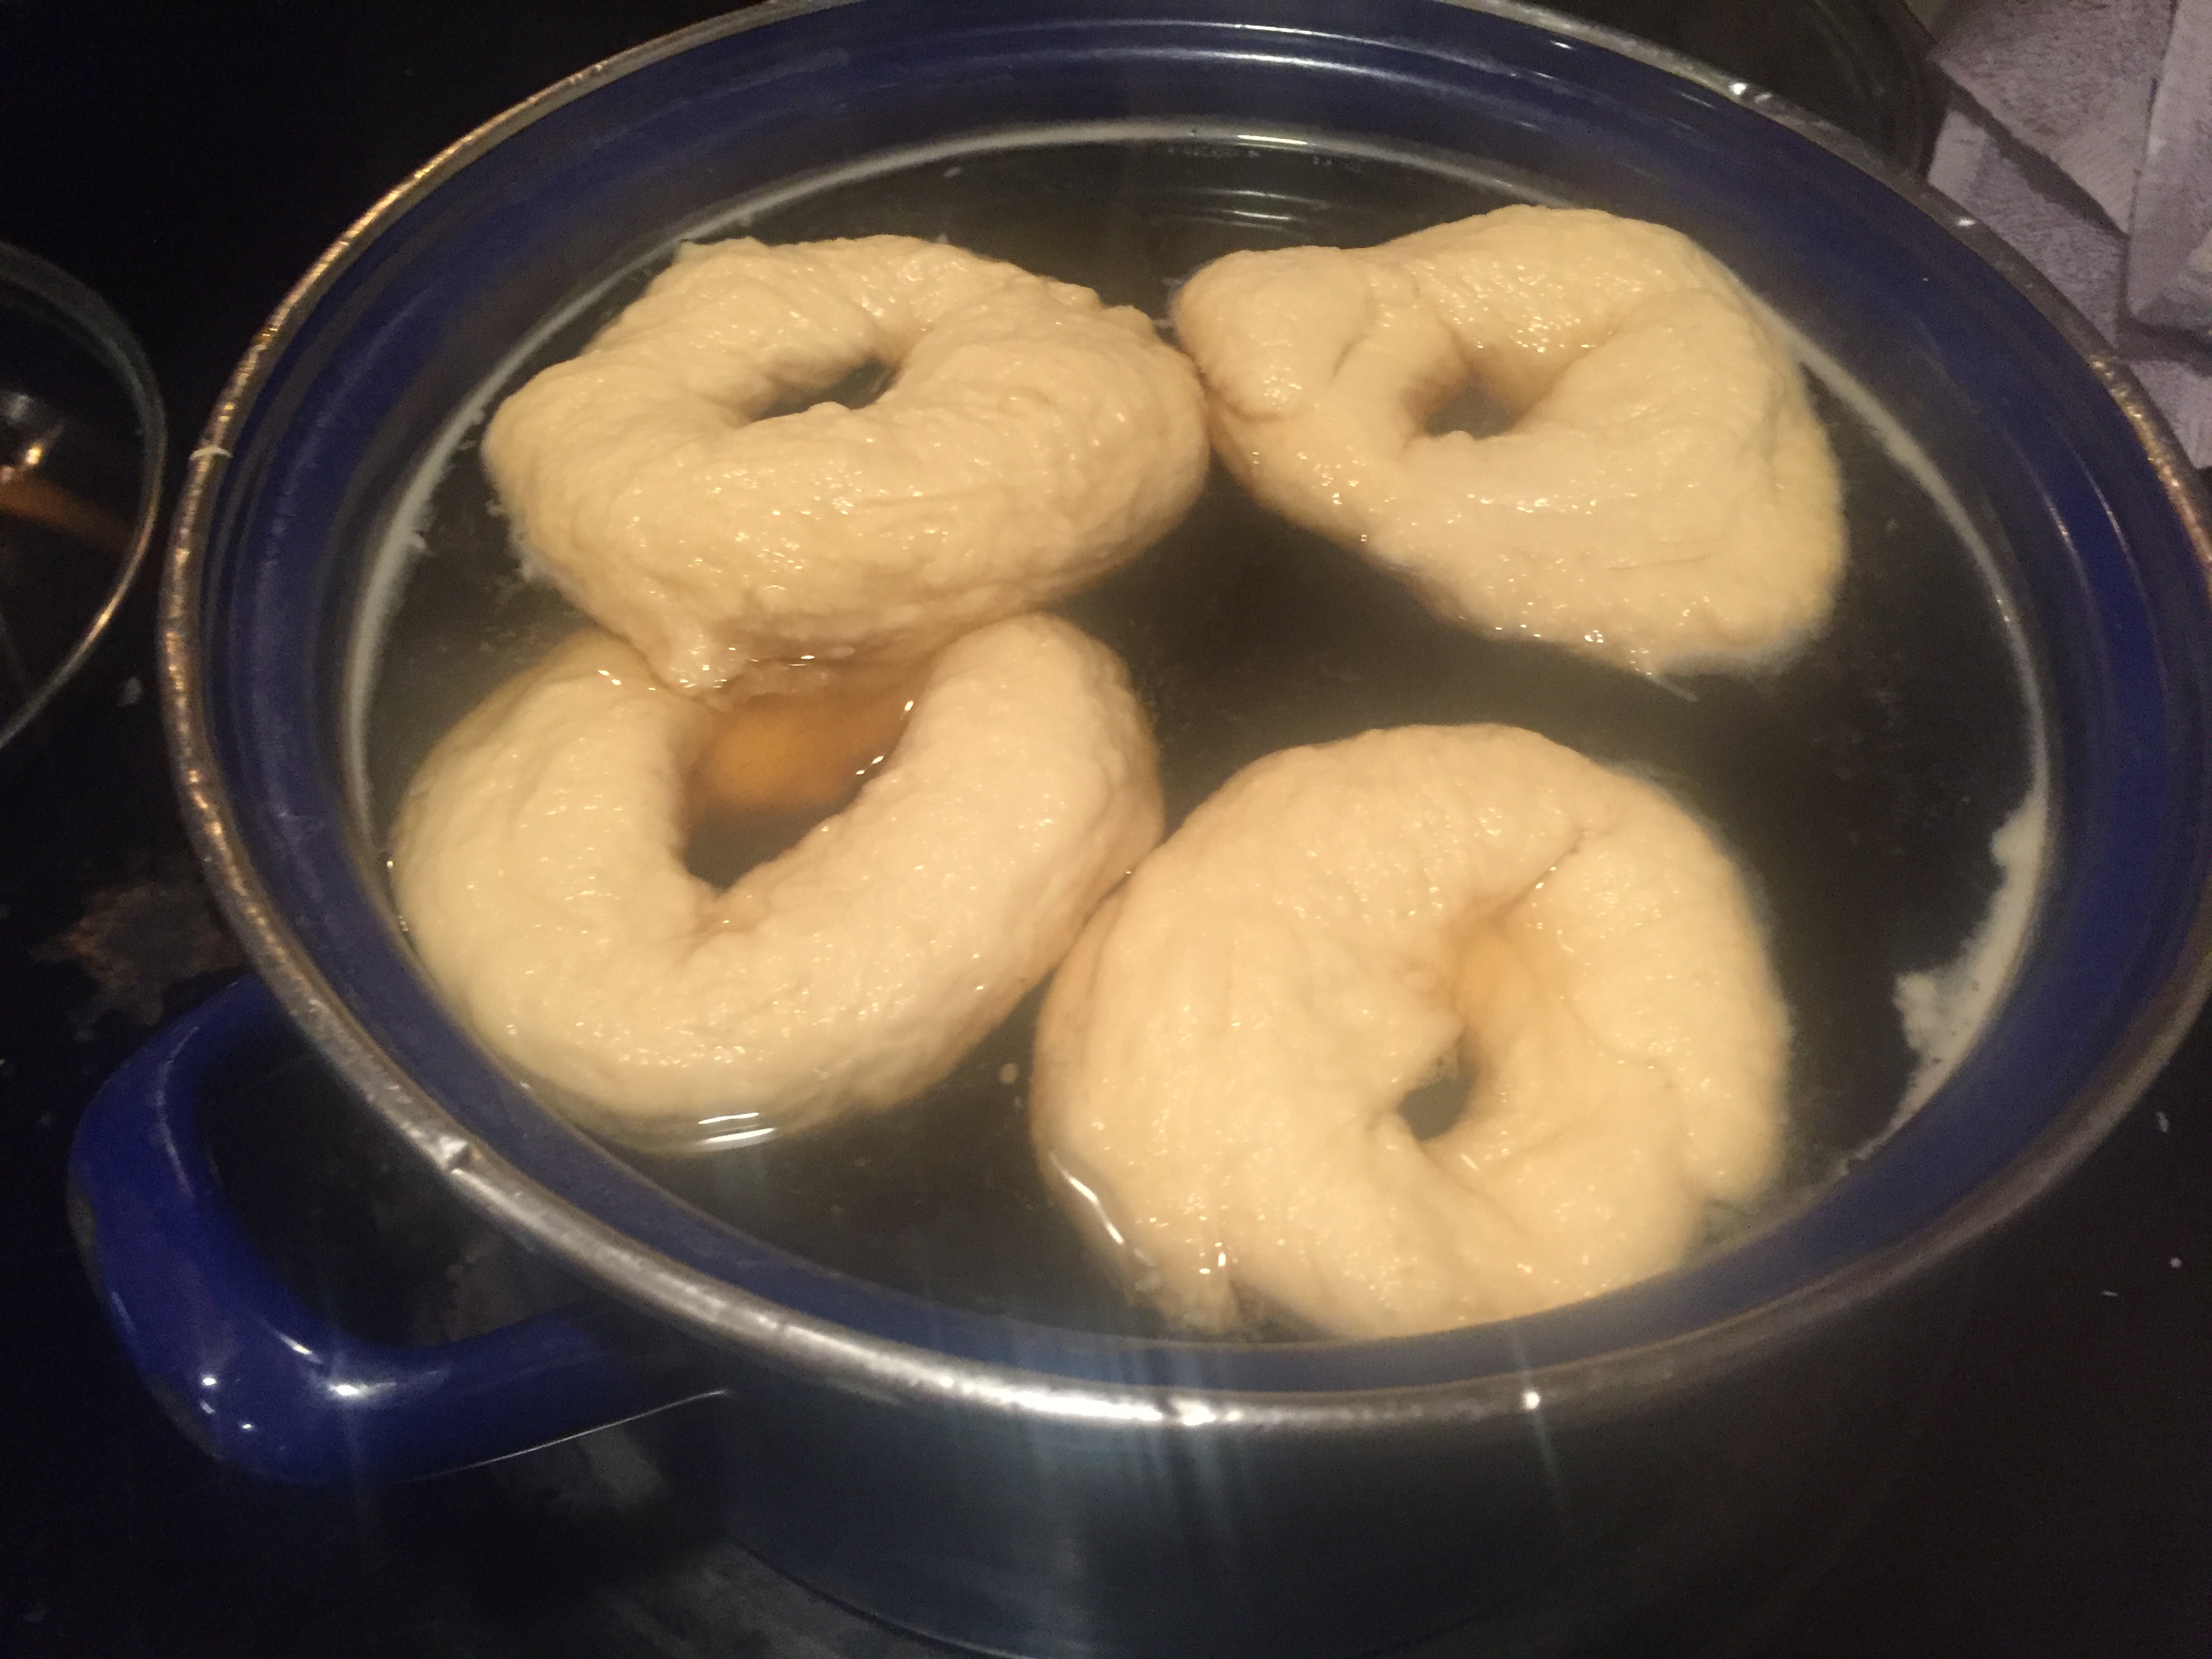
The recipe suggests a few steps that I ignored. It is likely this bad attitude that made the bagels more New York-style. The author directs you to use ‘unglazed quarry tiles’ which I didn’t have, so I baked them on my pizza stone. This was adequate, but there was just barely enough room to bake them all and keep them moving through the process of their bath to topping. She also suggested ‘flattening them’ which I didn’t do either. This would have resulted in kind of a mini-bialy or ‘flat bagel’, aka ‘flagel’, which I didn’t want. I wanted a more traditional roundish product. Lastly there was a suggestion to cover the finished-but-not-bathed bagels with a cotton cloth for 15 minutes. By that time, covered in dough and flour, hot in the kitchen, and with bowls and seeds everywhere, I regarded that as a low priority.
Lastly, because they were bigger, they needed more time to get golden brown. (The original recipe called for about 7-8 minutes on each side, but probably these take more like 20-25 minutes).
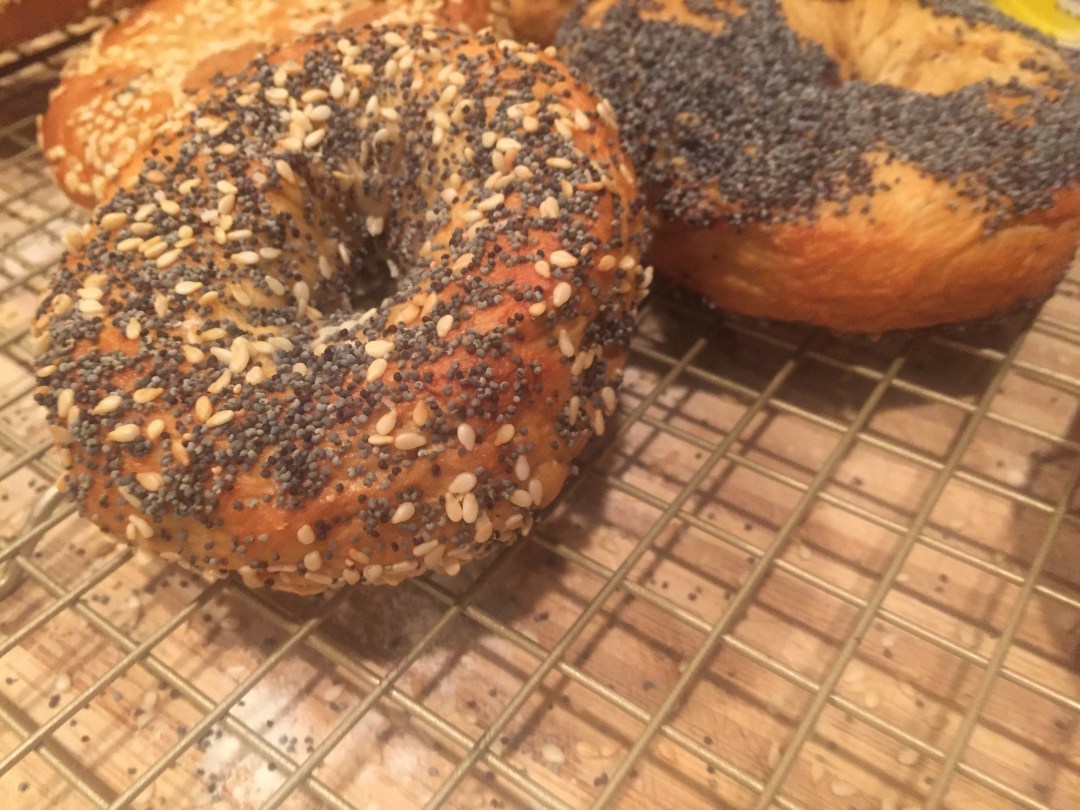
I insist you bake them until golden brown, and don’t ask me, you’ll know when they’re done. That’s what makes them CRISPY on the outside and chewy on the inside.
Just so you know before you get started, there are a few other recipes out there that promise to be easier, and use less ingredients. Both are found here. Don’t say I didn’t warn you.
Some kitchen equipment to make sure you have:
- 4-6 quart stockpot
- Pizza stone, baking tiles, etc.
- Slotted spoon or something you can pick up bagels from pot with
- Long tongs for above and moving around on the baking dish
- Metal spatula for variations on the same
- Baking rack for cooling
Ingredients
First bowl of stuff:
- 2 tsp sugar
- 1 cup lukewarm water
- 1 tablespoon active dry yeast
Second bowl of stuff:
- 2 tablespoons malt syrup
- 1/2 cup warm water
- 1 large egg
- 1 tablespoon vegetable oil
- 2 teaspoons salt (might want to go a wee bit heavier here, unless you planning to add sea salt as a topping)
- 4 cups all purpose flour (and more for shaping and rising)
- sesame seeds (uncooked), poppy seeds and kosher, sea or your favorite edible-sized salt
For the boiling bagel-bath water
- 3 tablespoons malt syrup
- 1 tablespoon of salt

Directions (are you sitting down?)
- Combine first bowl of stuff: 1 cup water and sugar and then yeast. (If you have supreme confidence in your yeast, you can proceed but I like to wait till there’s some bubbling and puffiness).
- In a separate bowl, combine the second bowl of stuff: dissolve the malt into the 1/2 cup water. Add the egg, oil and salt. Stir. Don’t put the whisk away, you’ll probably need to whisk again before combining as things with oil can separate.
- Using a stand mixer with a dough hook, add the first bowl of stuff and two cups of flour; mix for about one minute at the lowest speed.
- Then add the second bowl of stuff and the next 2 cups of flour and mix for about 3 minutes at the same speed.
- Then, prepare to separate the dough like you peel an advertising or price label off something you’re giving as a gift– slow, careful pulling. You’ll need some extra flour to make dough handleable, and then you can knead it a bit before throwing it into a bowl and covering with plastic wrap (I suggest you either spray the plastic wrap with PAM or throw some more flour on the dough, or you’ll have to de-tangle the plastic wrap from the dough when it’s done rising).
- Let rise for about 2 hours. Take out, punch down and let rise again for about 2 hours.
- When you’re ready for the whole thing to begin, take out the dough and cut into quarters. See my earlier note about size. There are lots of ways to ‘make bagels’ out of dough and they have been written about in detail at Serious Eats. I chose the rope method, which suggests you toss a thin log over your hand, pinch together voila- bagel shape.
- Prepare your boiling water.
- Turn your oven to 450 degrees and place your stone/tiles in it to warm up.
- Slip in three-four bagels at a time and let them fall and resurface- leave them in for about a minute (when accidentally leaving them in longer I didn’t notice any appreciable difference in texture). Add toppings
- About Toppings: It is easiest to attach toppings when the bagels are wet, but I noted that sesame seeds are great for having in a bowl and flopping the moist rings in. Poppy seeds not as much. It’s just an opinion, but too many poppy seeds on your bagel gets in the way of seeing the golden brown deliciousness of the bagel, and also makes them look like amateur New England bagels instead of professional NY style bagels. So I recommend sprinkling the poppy seeds (and Salt) on top of the bagel rather than dipping/dredging. And of course, ‘do you do both sides?’ is a personal question that you’ll have to answer for yourself.
- Transfer topped bagels to baking stone. Bake for about 12 minutes per side, or until golden brown. Really golden brown, not just golden.
- Remove and cool on baking rack.
- Devour. Cut and freeze remaining bagels, they store well and toast well.
I like mine with cream cheese (Zausners), Lox, a lemon squeeze and a sprinkle of dill weed and crushed pepper. But these are so good, you can just eat them with a little salted butter (Kate’s)

